AI resources
Configure store information
We recommend you customize the checkout information of the store to ensure a better shopping experience and a smoother integration between Mercado Pago`s checkout and Shopify. To do so, follow the steps below:
Configure the company name
- Go to your Shopify store.
- In the store's admin panel, click on Settings.
- Once there, select the Checkout option.

- In the Customer information section, select the "Company name" field as mandatory.

- Click on Save.
Setting up store language
- In the store's admin panel, click on Settings.
- Once in Settings, click on Languages.

- In the "Store languages" section, you'll be able to choose the language in which you want the store to operate. Click on Change default value.

- On the next screen, choose your preferred language.
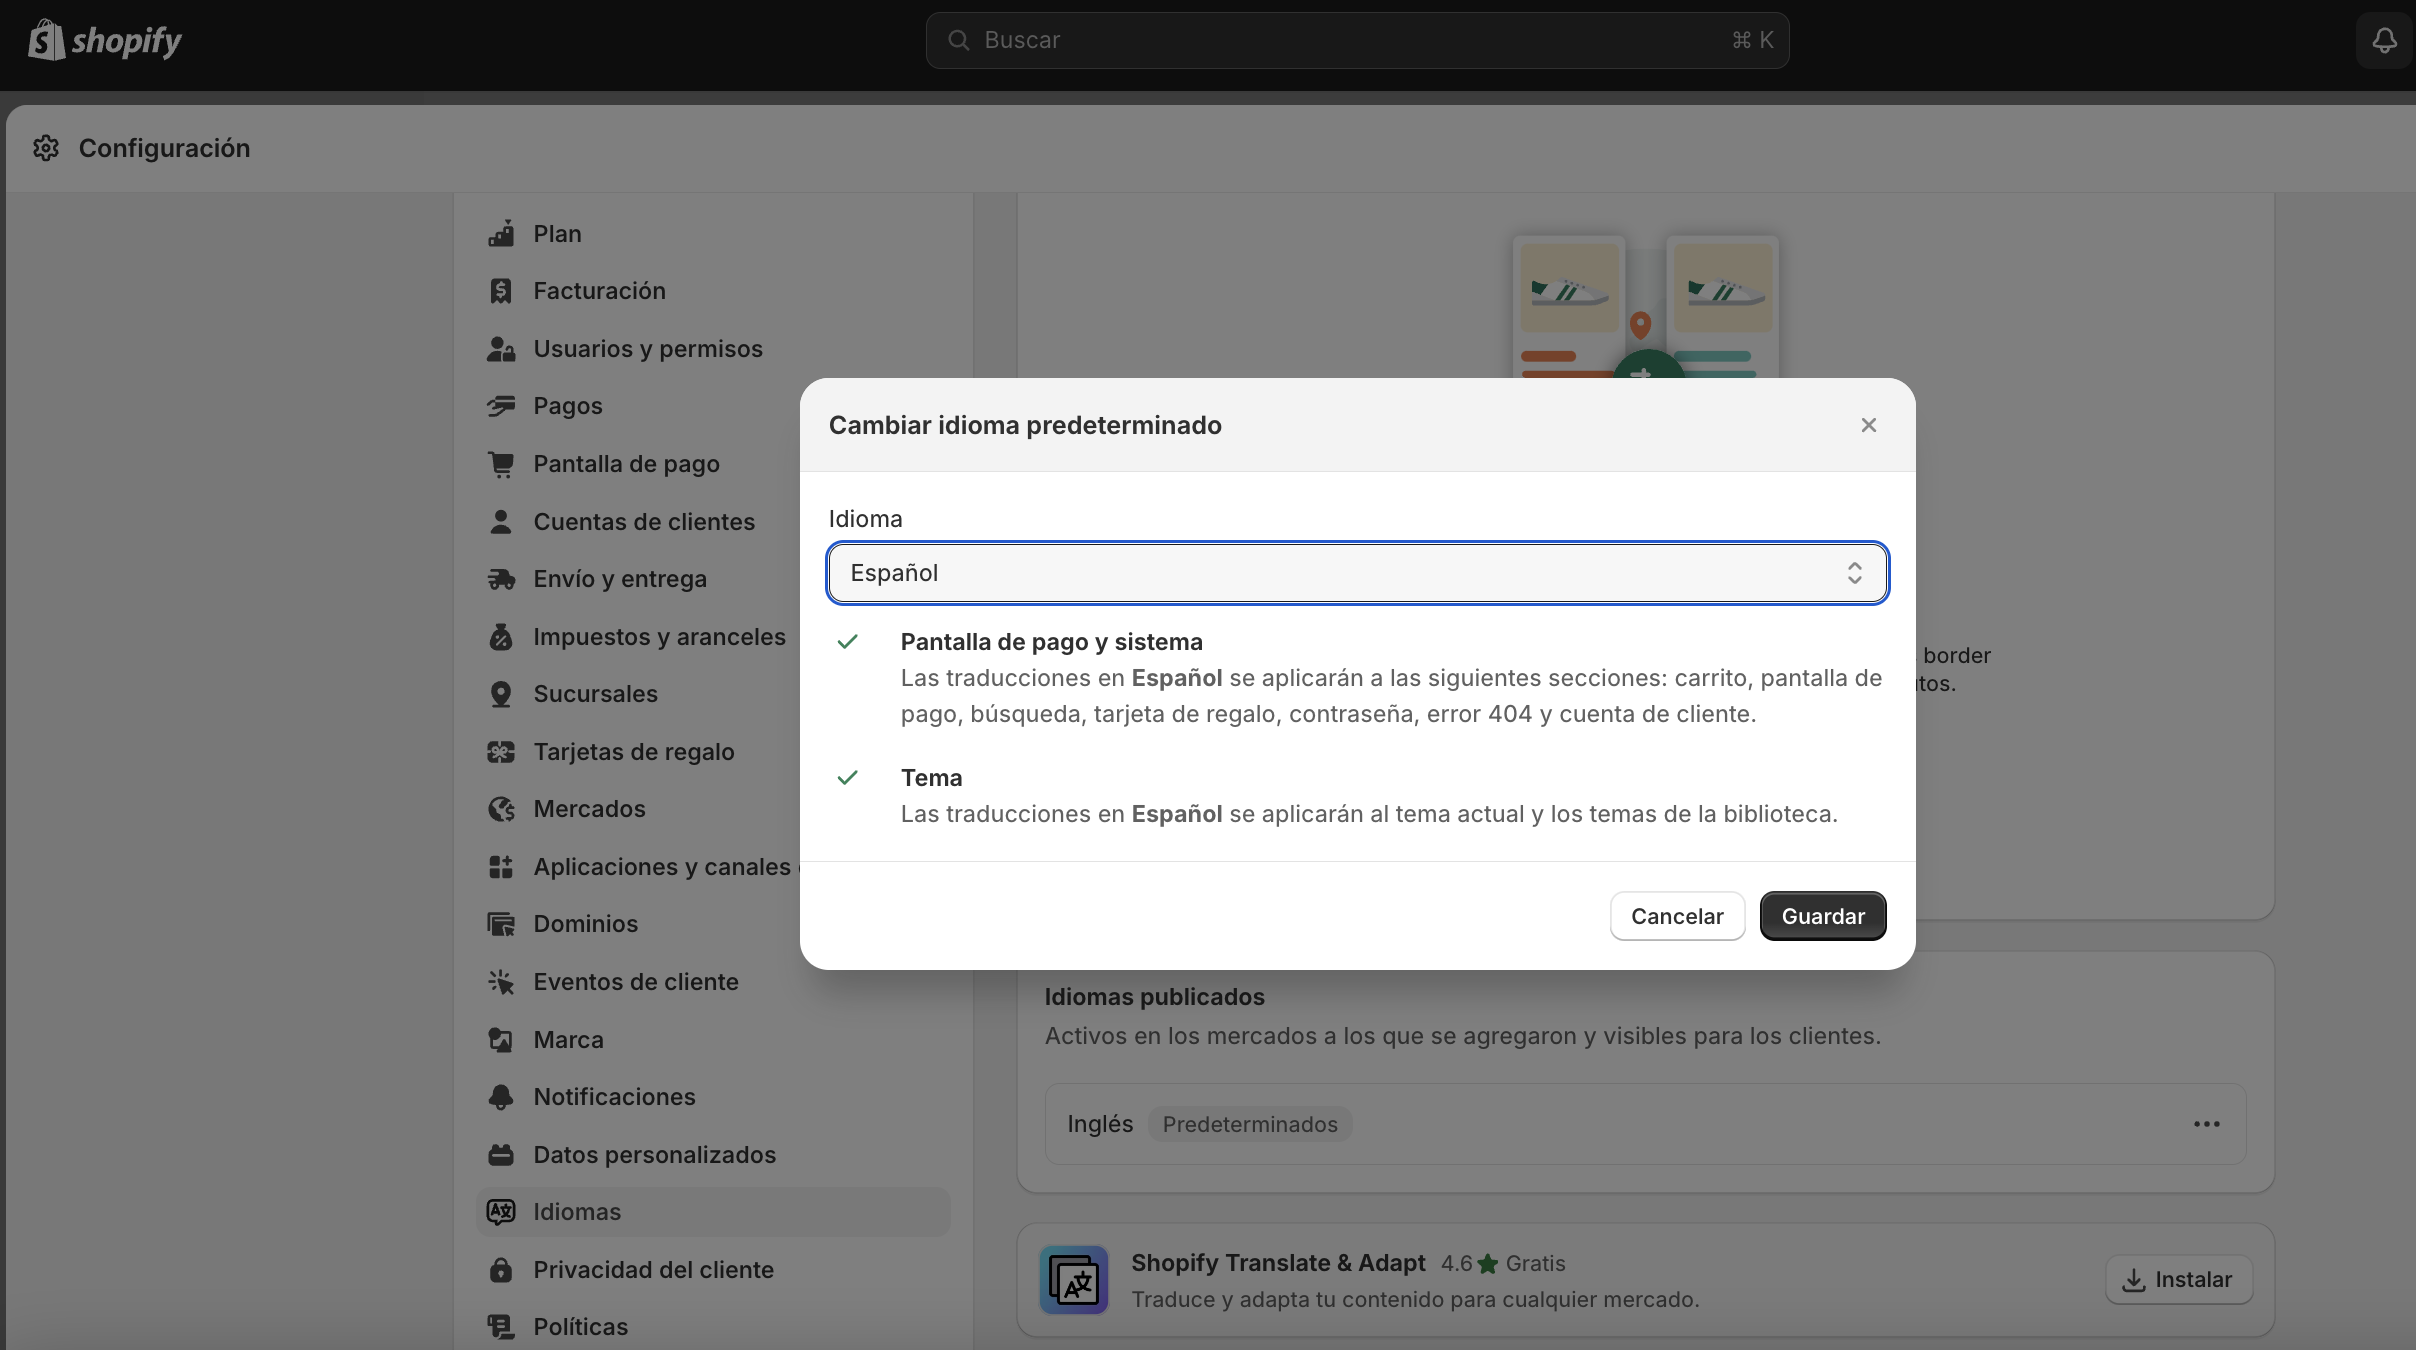
- Click on the Save button.
Adjusting buyer's personal identification values
The Shopify store will display fields requesting the buyer's personal identification with the term "Company". To change this to the identification requested by the country in which the store operates, follow these steps:
- In the store's admin panel, click on Settings.
- Once there, select the Checkout option.
- In the "Checkout language" section, click on Manage checkout language.

-
On the next screen, use the site's search bar to search for the word "Company". The search will return several fields that you can modify.
-
Replace the following entries with the indication of the type of personal identification your store will request according to the country where it operates:
- Company label
- Optional company label
- Address company blank
- Click on Save.